Automatic Reply from Classic Outlook - Desktop
We are currently upgrading from Windows 10 to Windows 11. The desktop interface may appear differently than presented in this documentation. Please bear with us as we update and resolve these discrepancies. This process will not affect the online experience.
Refer to https://support.microsoft.com/en-US for additional information on Microsoft subjects.
Some instructions require appropriate permissions to complete the task.
There are two ways to send automatic out-of-office replies in classic Outlook. The way you do it depends on the type of email account you have. To determine the account type select File on the left end of the ribbon then select the image below that matches your version of Outlook.
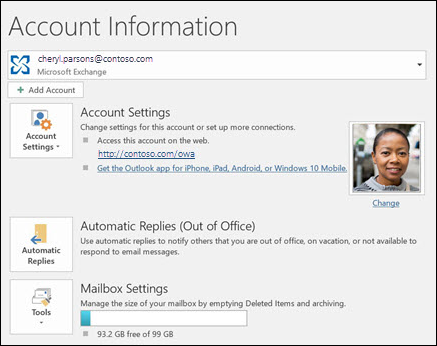
If you see the Automatic Replies button, follow the steps below.
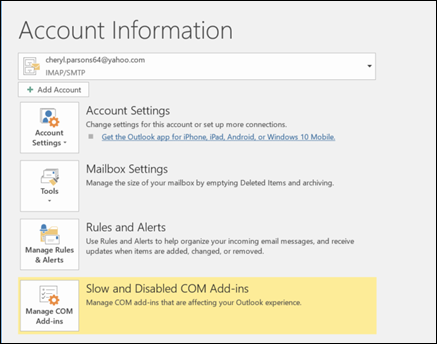
If you don't see the Automatic Replies button, jump to Use Rules to Reply to Incoming Email
Set the Automatic Reply
Select File > Automatic Replies.
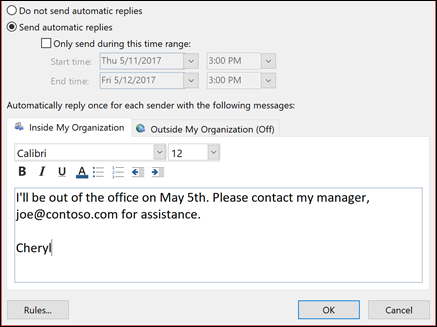
In the Automatic Replies box, select Send automatic replies.
Optionally, set a date range for your automatic replies. This will turn off automatic replies at the date and time you enter for the end time. Otherwise, you'll need to turn off automatic replies manually.
Note: If you don't see Automatic Replies, use Rules and Alerts to set up your out-of-office message.
On the Inside My Organization tab, type the response that you want to send to teammates or colleagues while you are out of the office.
Note: Sending automatic replies to anyone outside my organization will send your automatic reply to every email, including newsletters, advertisements, and potentially, junk email. If you want to send automatic replies to those outside your organization, we recommend choosing My contacts only.
Select OK to save your settings.
Turn Off Automatic Replies
When Outlook is set to send automatic replies, you'll see a message under the ribbon with this information. Select Turn off to disable automatic out-of-office replies. If you want to modify the dates for your automatic reply or the message sent, use the steps above to modify your settings.


Only certain types of accounts support the Automatic Replies (Out-of-Office) feature. If you don't see the Automatic Replies button, your email account doesn't support this feature. However, if you leave Outlook running while you're away, you can use rules to reply to your email messages automatically. Rules also allow you to forward emails to another account, mark messages as read, or move them to a folder automatically.


Use Rules to Reply to Incoming Emails
When you click File in Outlook, you should see a screen that looks something like this:

If you see a button that says Automatic Replies, see Set Automatic Reply.
Otherwise, use the following steps to create a template to reply to messages and set up Outlook to reply to every message you receive.
Create an out-of-office template
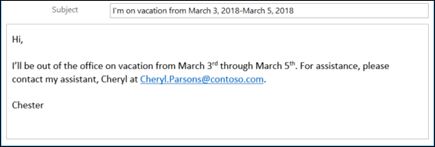
In Outlook, create a new email message.
Enter a subject and message body for your out-of-office template.
Select File > Save As.
Give your template a name and in the Save as type drop-down, select Outlook Template (*.oft).
You can change the location for your template, but you can also pick the default location, which is usually c:\users\username\appdata\roaming\microsoft\templates. Click Save.
You can create a new template every time you're out of the office or reuse an existing template. Now you're ready to use that template to create your Out-of-Office rule.
Create an out-of-office rule
On the File tab, select Manage Rules & Alerts.
In the Rules and Alerts dialog box, on the E-mail Rules tab, select New Rule.
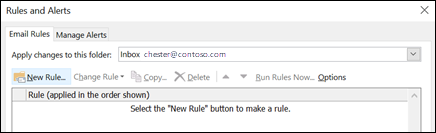
Under Start from a blank rule, click Apply rule on messages I receive and click Next.
To reply to every email message you receive, leave the Step 1 and Step 2 boxes unchanged and click Next again. Select Yes when Outlook asks you if you want to apply this rule to all messages.
Under What do you want to do with the message, in Step 1: Select action(s), select reply using a specific template.
Under Step 2: Edit the rule description, click the underlined text for a specific template.
In the Look In box at the top of the Select a Reply Template box, select User Templates in File System.
Select the template you created above, and then select Open and Next.
You can add any necessary exceptions, then select Next.
Give your rule a name, for example, Out of Office.
By default, Turn on this rule is checked. If you're ready to turn on your out of office reply now, select Finish. Otherwise, uncheck this box. You can turn the rule on at a later date.
Note: In order to have the rule send automatic replies to your email messages while you're gone, you must leave Outlook running.
Turn on a rule
If you created your out-of-office template and rule a few days before you needed it, turn the rule on using the following steps.
Select the File > Manage Rules & Alerts.
In the Rules and Alerts dialog box, on the E-mail Rules tab, find the rule you created and check the box to the left of the rule. Then select OK.