Install RAM
For Internal Use ONLY: Data Classification RESTRICTED.
For Lenovo Laptops
Shut down the computer. Make sure it is completely off before proceeding.
Remove any connected items, including the charging cable, and flip it upside down.
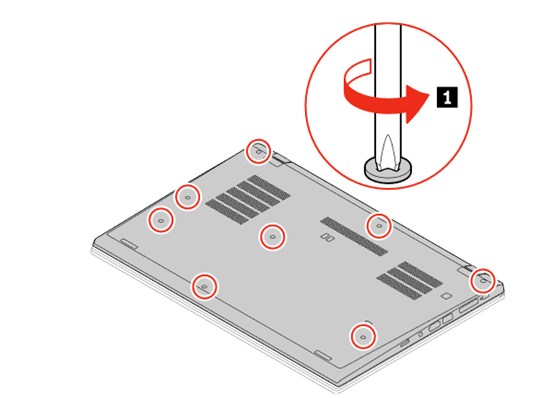
Loosen the eight screws. Please note that the screws will not come out; they will only loosen.
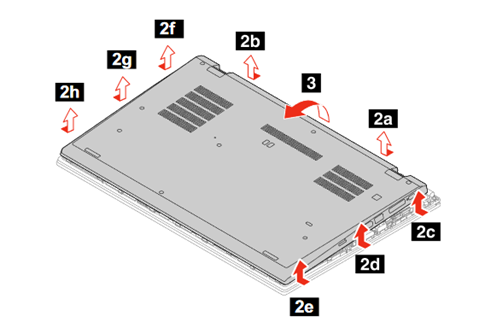
Work your way around the edges, separating the cover from the laptop. You must apply some pressure to get the clips to snap out, but not too much. It helps to have a flat-edge tool to wedge in and glide around.
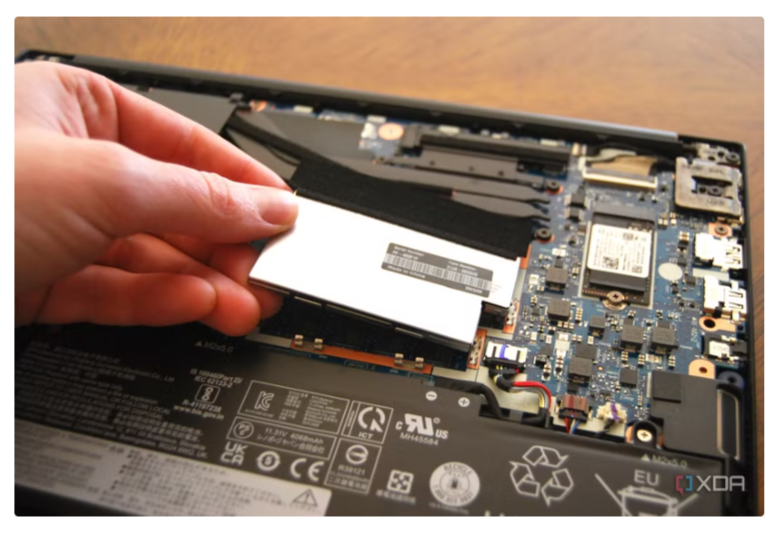
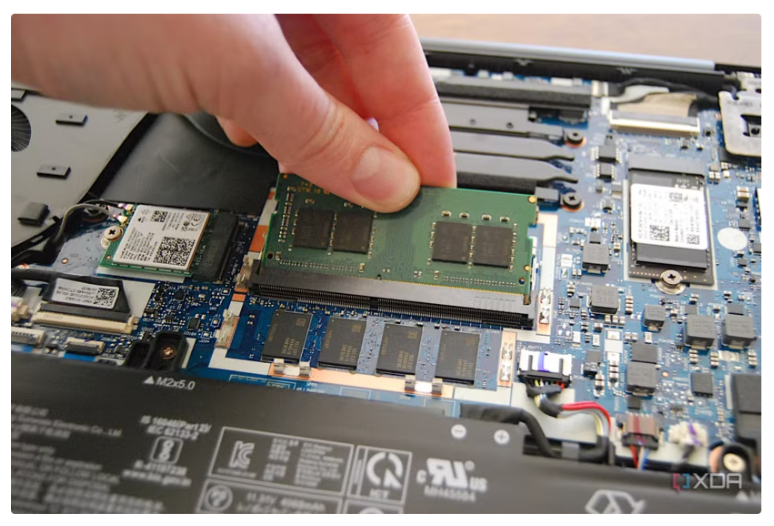
There should not be an existing memory module in the device; it should have an open slot for you to install one.
Re-attach the bottom cover (make sure it is fully clipped in before you start screwing the screws back in.
Install the New RAM Module
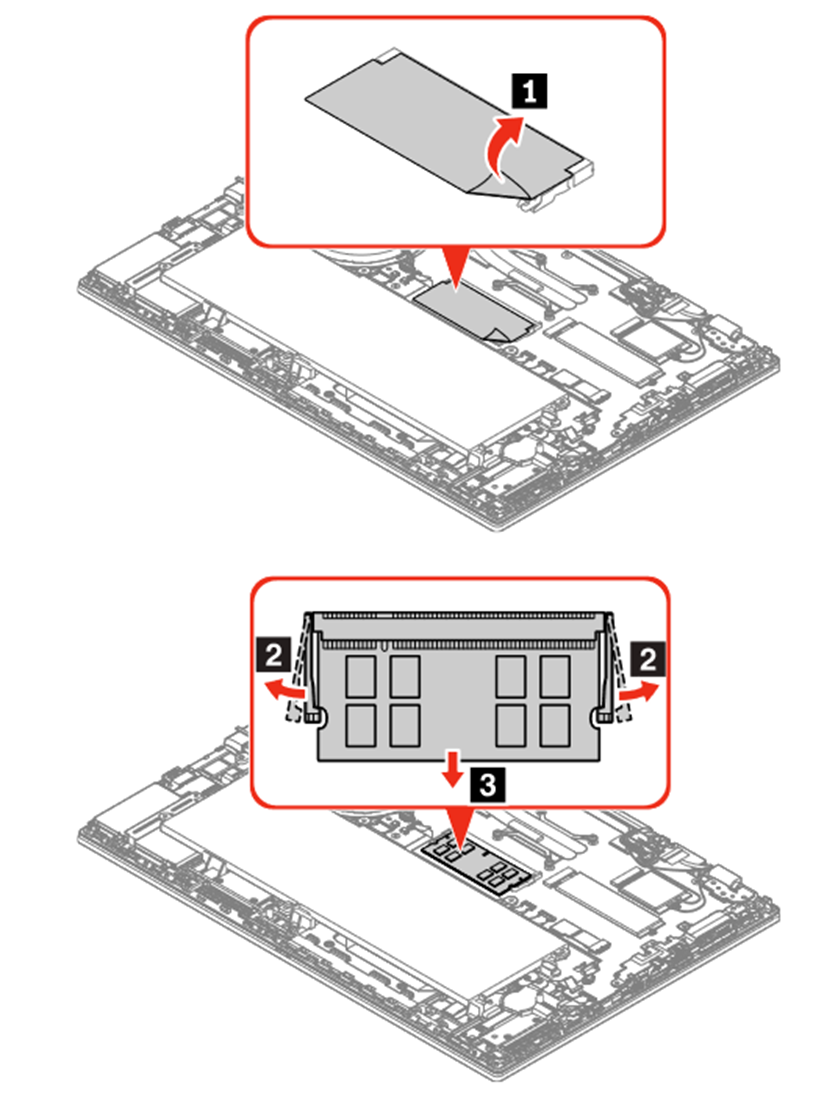
Locate the unused slot and remove the blank.
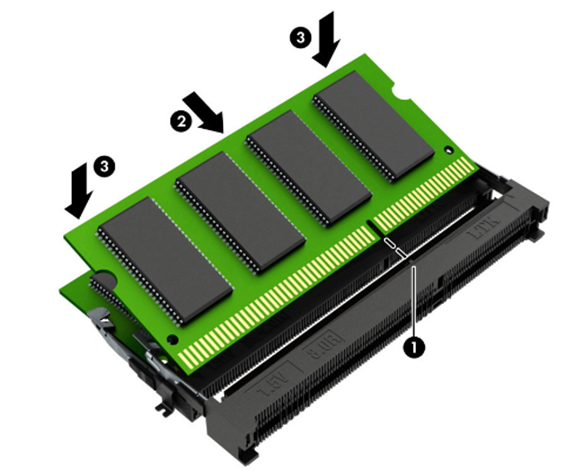
Identify the notch on the RAM module. Ensure it aligns with the corresponding notch in the RAM slot.
Insert the RAM module at a 25-degree angle into the slot.
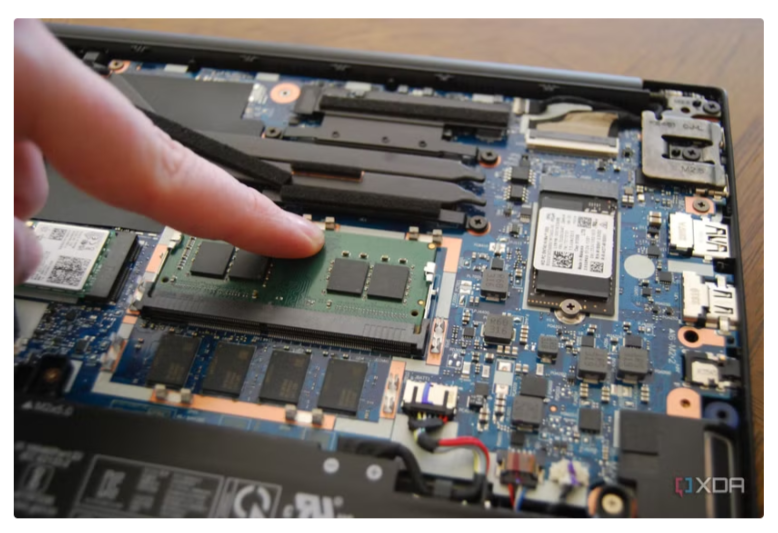
Gently press down on both sides of the RAM module until the clips on the sides click into place, holding it securely in position.
For the HP Laptop
Use CT8G4SFS824A; you will be installing an additional stick
Turn off the computer, and make sure it is completely off before continuing.
Disconnect everything, including power, and flip the laptop over.
Use a Phillips-head screwdriver to loosen the eight screws on the laptop's bottom. The screws will not come all the way out.
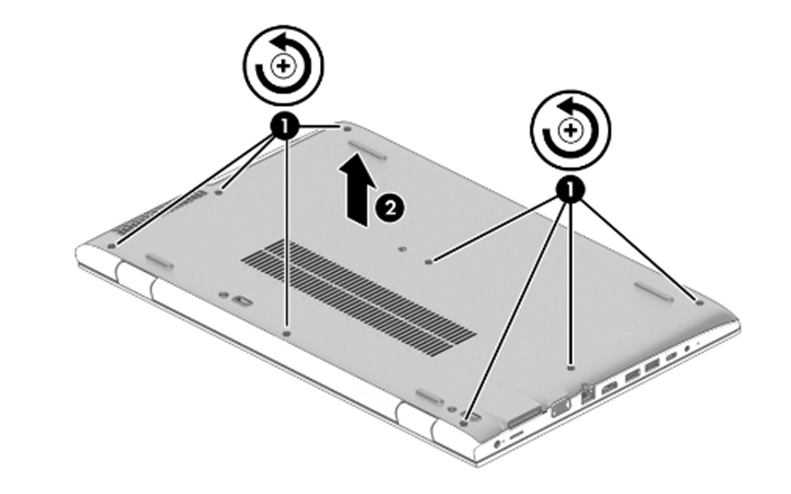
Pry open the case.
Insert the RAM into the open slot.
For the Six (6) Desktops
ThinkCentre M710q – Use CT8G4SFS824A
ThinkCentre M715q – Use CT8G4SFRA32A
Shut down the computer, disconnect anything plugged in, and remove it from the back of the monitor. Video instructions available here: https://www.youtube.com/watch?v=c9R9fbo9CEw
Remove the screw on the back of the computer, and slide the cover forward.

Turn the computer over, and slide off the bottom cover.

This reveals the RAM slots. One should already be filled. Install the new RAM in the open slot.