Brother QL-820NWB Connect to WiFi
When using the Ethernet port on the QL-820NWB isn’t an option because of the label printer location or if the label printer isn’t getting a network connection from the Ethernet port, follow these steps to connect your QL-820NWB to the WiFi:
If not on the main screen, navigate using the ↩ button.
Press the Menu button.
Use the ▲ ▼ buttons to select WLAN > WLAN (On/Off) > On in the settings menu. Press OK.
Use the ▲ ▼ buttons to select WLAN > Infra Manual Setting in the settings menu. Press OK.
Use the ▲ ▼ buttons to select the WiFi network (Contact ithelp@thrivepet.com if you are unsure of the Staff WiFi information). Press OK.
Provide the password for the selected WiFi network.
On the top right of the screen. Press the Menu button to switch between uppercase, lowercase, numbers, and symbols.
Use the ▲ ▼ buttons to select the correct characters.
If it connects, it will say, “Connected!” Press OK.
If it does not connect, repeat steps 1 through 6.
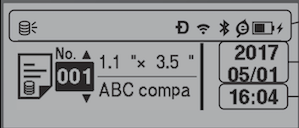
Press the ↩ button to return to the main screen and see the Wi-Fi icon in the top right.
Reset data (QL-820NWB)
You can reset the following settings using the LCD menu:
Press the Menu button.
Use the ▲ ▼ buttons to select Administration, and then press the OK button.
Use the ▲ ▼ buttons to select Reset, and then press the OK button.
Use the ▲ ▼ buttons to select the reset menu, and then press the OK button.
Refer to the table below:
Reset menu | Settings | Description |
|---|---|---|
Factory Reset | Reset | Returns all printer settings, including communication and device settings, to their factory defaults. |
User Data Reset | Reset | Returns all device settings to their factory defaults. |
Network Reset | Reset | Returns the communication settings to their factory defaults. |