Outlook: Create a Shared Calendar
We are currently upgrading from Windows 10 to Windows 11. The desktop interface may appear differently than presented in this documentation. Please bear with us as we update and resolve these discrepancies. This process will not affect the online experience.
Refer to https://support.microsoft.com/en-US for additional information on Microsoft subjects.
Some instructions require appropriate permissions to complete the task.
When you create an additional/secondary calendar, you might add events to that calendar and expect those events also to impact your availability. However, when others view your availability using the Scheduling Assistant, the secondary calendar events aren’t shown. This behavior is by design. Only events on your primary calendar impact your availability.
Note: If these steps don't work, you may not be using new Outlook for Windows yet. Selecthttps://pathwayvets.atlassian.net/wiki/spaces/TSH/pages/edit-v2/2964946945#Classic-Outlookand follow those steps.
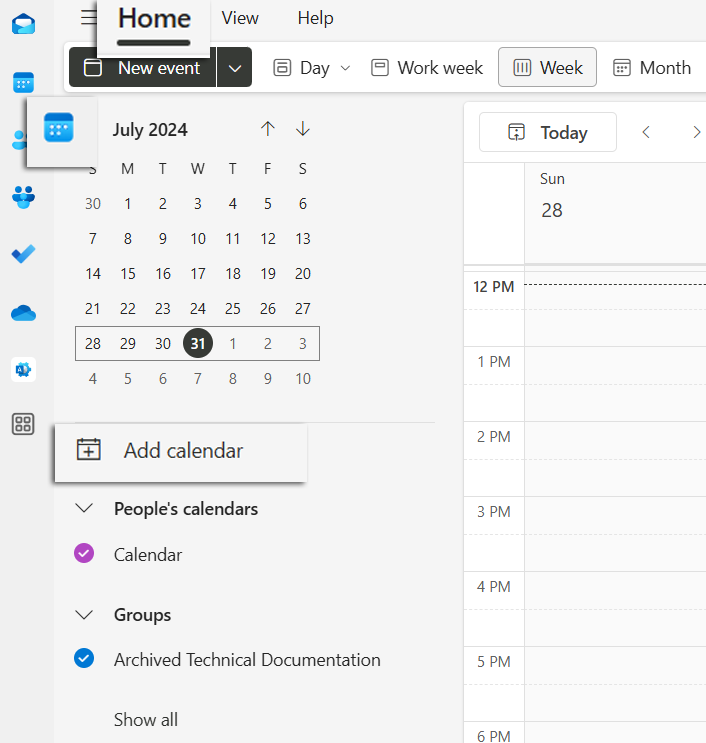
In calendar, select the Home tab.
Below the calendar grid, select Add Calendar.
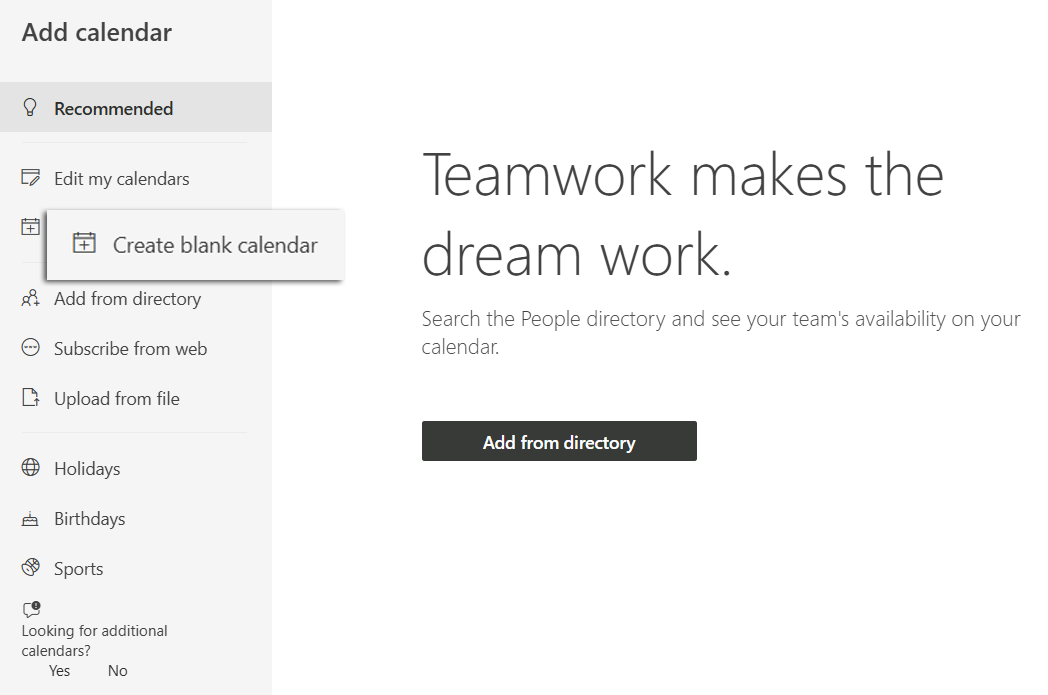
Select Create blank calendar.
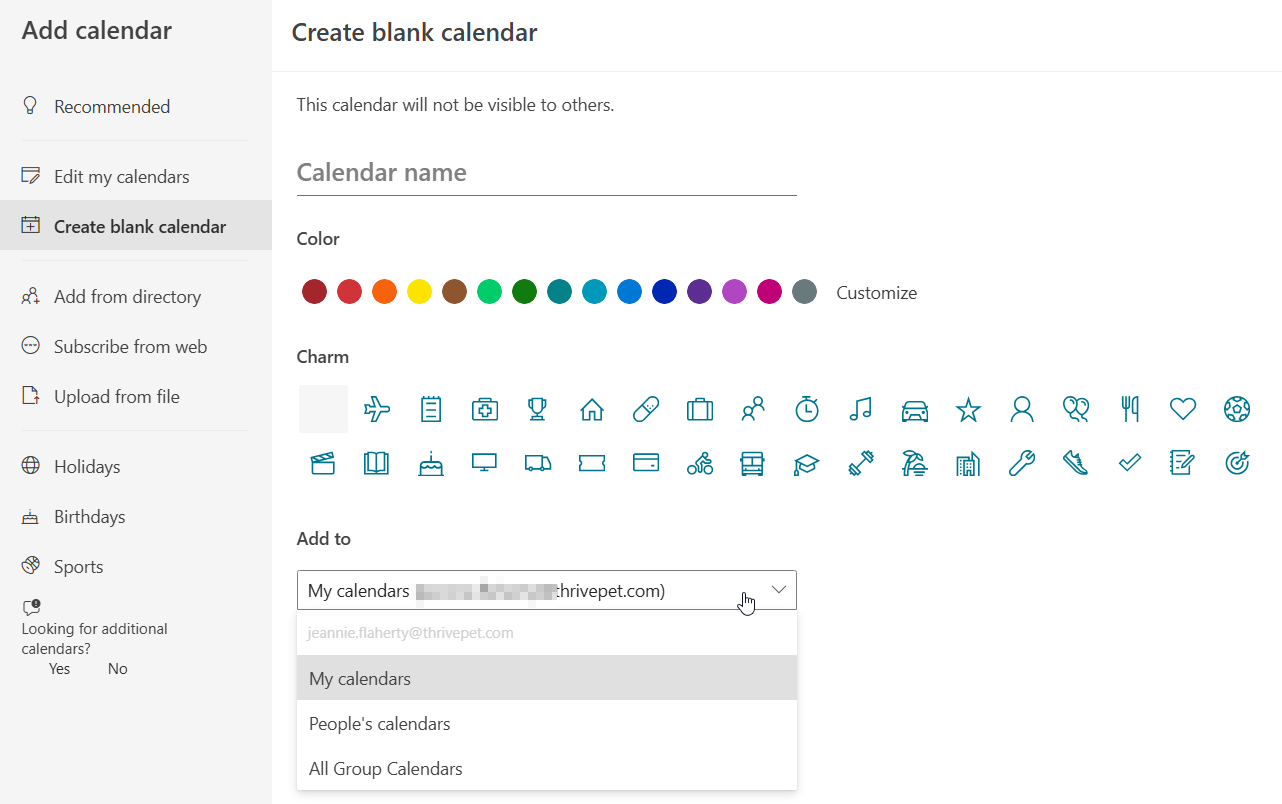
Enter a Calendar name, Color, and Charm. Then, under Add to, select which category to add the calendar to select, then Save.
Tips:
To share a calendar, see Share an Outlook calendar with other people.
To open a shared calendar, go to Home > Add calendar > Add from directory.
To delete a calendar, right-click the calendar name in the Navigation pane, and then select Remove.
Classic Outlook
In Calendar, select the Folder tab.
In the New group, select New Calendar.
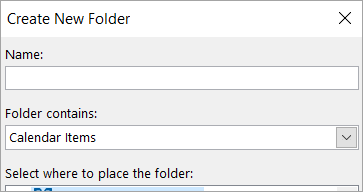
Tip: You can also create a new calendar if you are in Mail or People. From the Folder tab, select New Folder, then in the Folder contains list, select Calendar Items.
In the Name box, type a name for the new calendar.
In the Select where to place the folder list, select Calendar, and then select OK. The new calendar appears in the Calendar Navigation Pane.
To view a calendar, select the check box for the calendar.
When multiple check boxes are selected, the calendars appear in a side-by-side view and can be switched to the calendar overlay view.
Tip: To delete a calendar, right-click the calendar name in the Navigation Pane, and then select Delete calendar name.