Outlook: Append Credentials to the Signature
We are currently upgrading from Windows 10 to Windows 11. The desktop interface may appear differently than presented in this documentation. Please bear with us as we update and resolve these discrepancies. This process will not affect the online experience.
Refer to https://support.microsoft.com/en-US for additional information on Microsoft subjects.
Some instructions require appropriate permissions to complete the task.
Purpose
Our technologies require manual entry to append credentials to the Outlook email signature. In some cases, following these instructions may result in a double signature at the bottom of an email. In these circumstances, contact the Technology Service Desk to have the duplicate signature removed from the email.
Individual experiences may differ depending on the Outlook version.
Use the following steps to create your own Thrive Pet Healthcare Signature, including your credentials. For every operating system, complete both sections to successfully append the credentials.
Reference Files
Use these template files when directed.
If you are a member of the 80/80 Club and wish to append the logo to your signature, please choose from the following options:
Web-Based Outlook Signature
Create the New Signature
To open Outlook Online, sign in to http://office.com.
Select Outlook from the left-hand application bar.
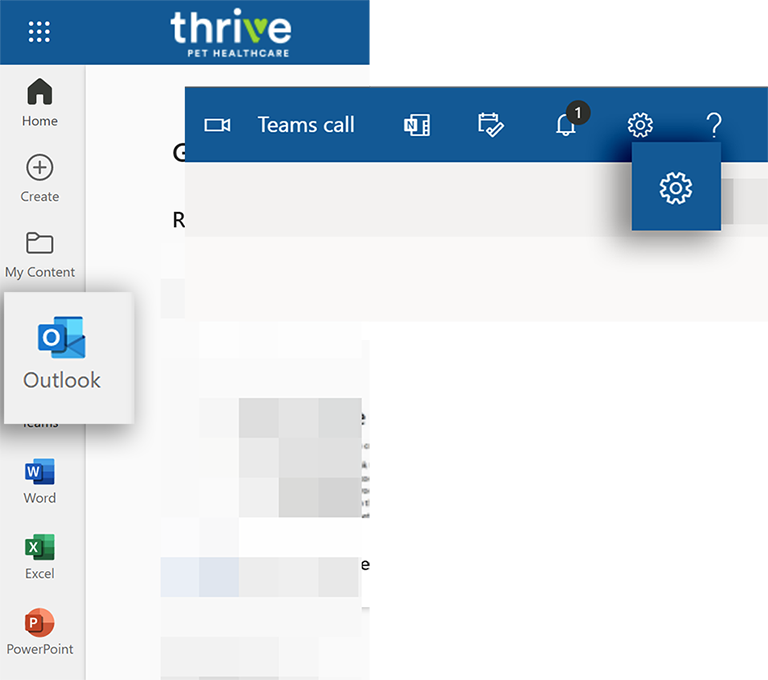
Select the gear/cog from the top right-hand corner.
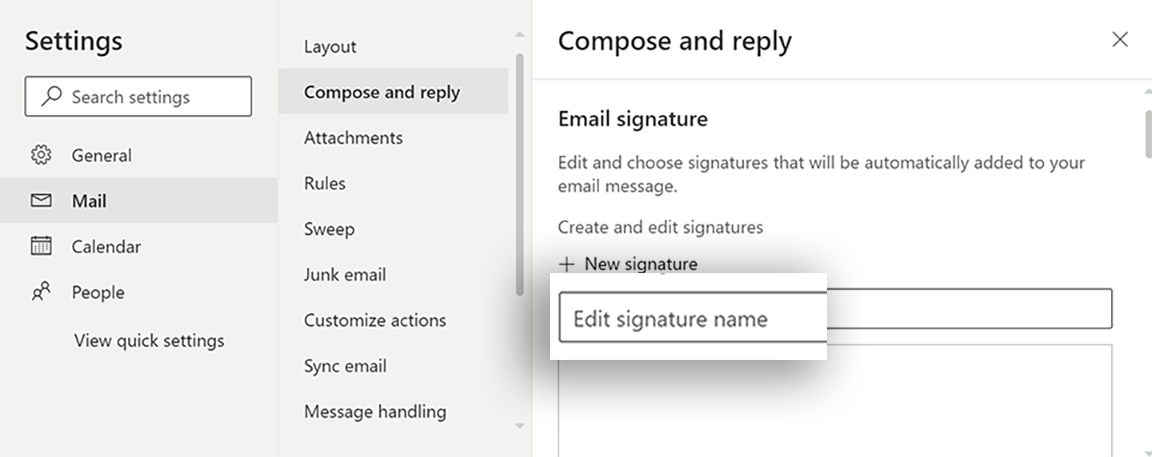
Choose View all Outlook settings from the bottom of the Settings pane.

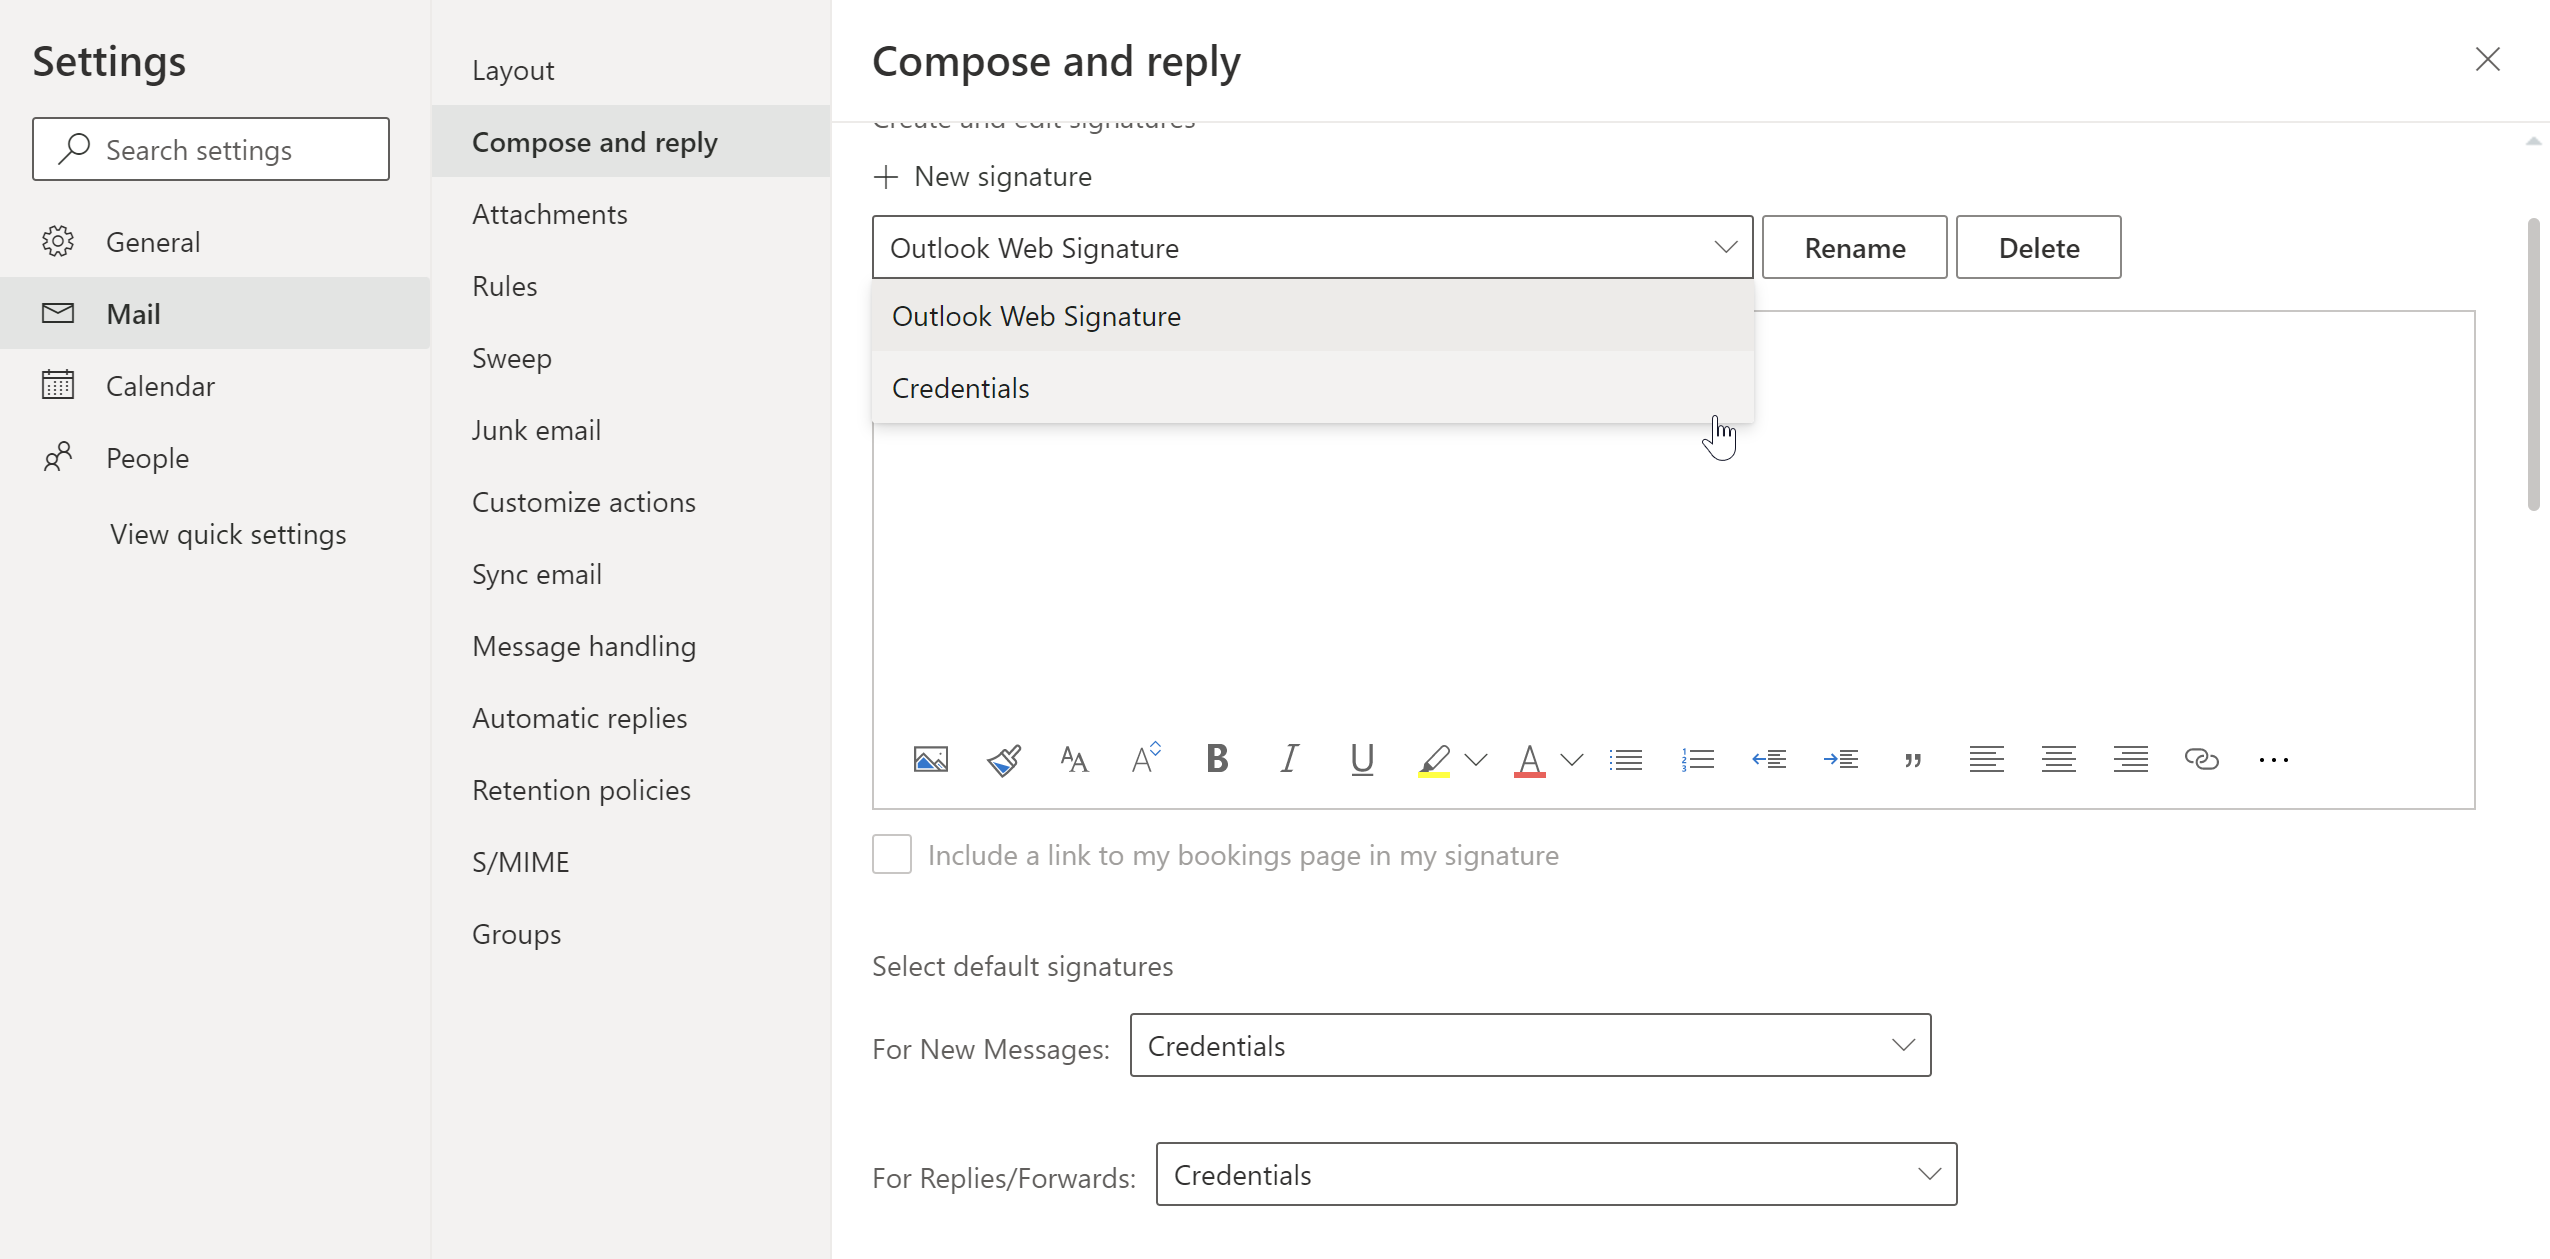
From the Settings window, select Mail from the left-hand column.
Select Compose and reply from the middle column. The right-hand column is the signature panel.
Select +New signature.
Add a title for this signature to replace Edit signature name.
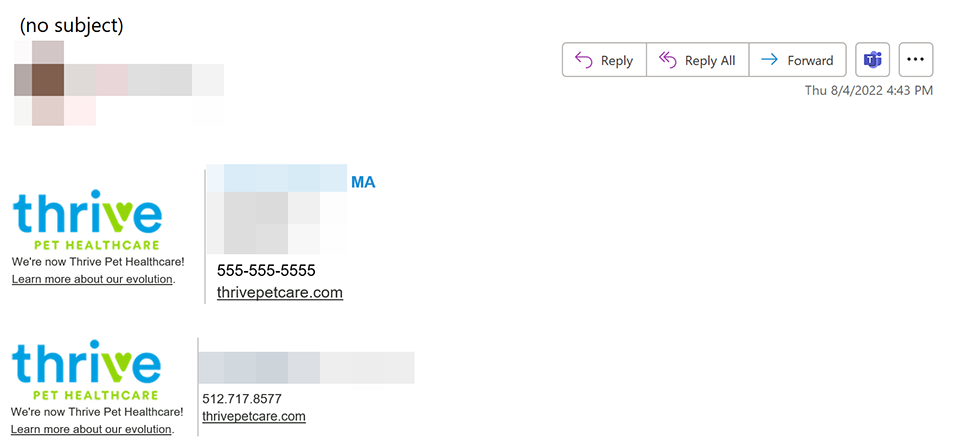
There are three signature templates available on SharePoint in Technology Central and listed in the Reference Files above. Open the correct file, select it, and copy the template signature. Paste the copied signature block into the Signature Editor.
Tip: Pull the cursor over the image and the signature block. When clicking the right mouse button to copy, hover the cursor over the text portion of the signature.
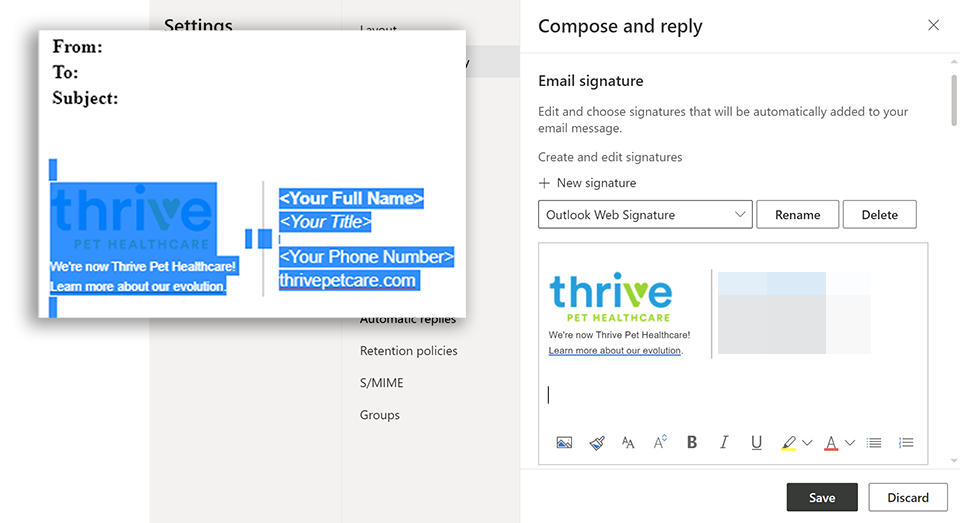
Insert your professional name, credentials, job title, and phone number into the <angle brackets>, and remove the angle brackets when your entry finishes.
Click the Save button and continue below to attach the new signature to emails.

Attach the New Signature to Emails
To append the new signature, under the signature panel, select when to use the new signature by choosing the new signature created in step 8 above from the drop-down in Select default signatures.
Click Save in the lower right-hand corner before exiting the Settings window.
Video demonstration for Windows 11
Desktop-Based Outlook App Signature
Individual experiences may differ depending on the Outlook version.
This SECOND process only applies to desktop-based Outlook. Complete this process ONLY AFTER completing the web-based process above.
Find an email with the desired signature created through the web-based process above.
Highlight your signature, right-click, and select Copy.

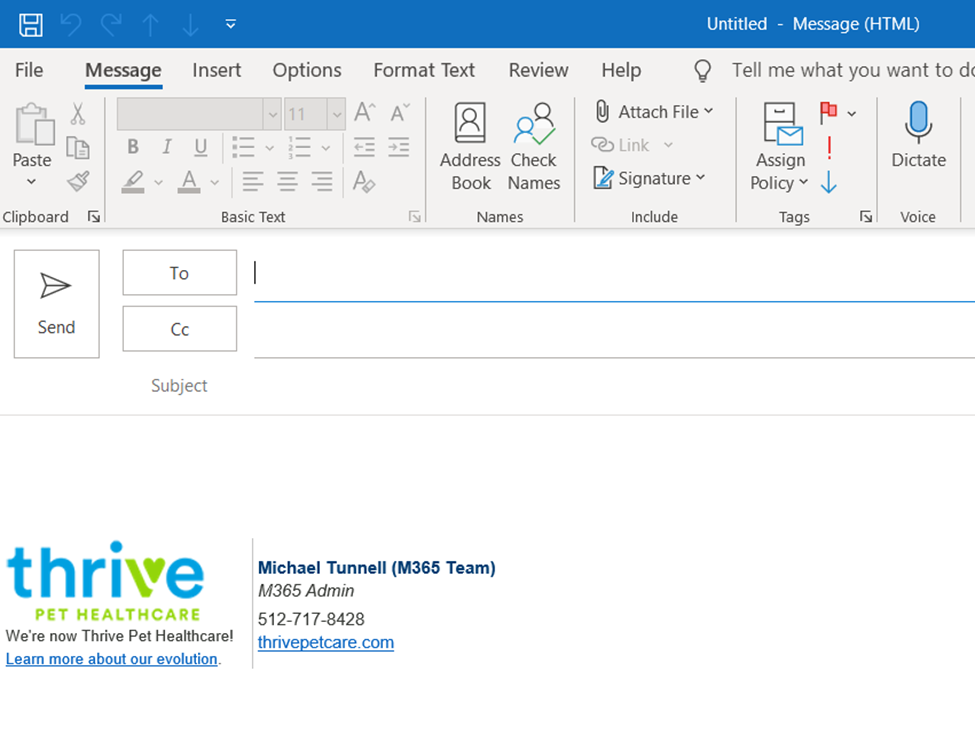
Create a new email as if sending it to someone.
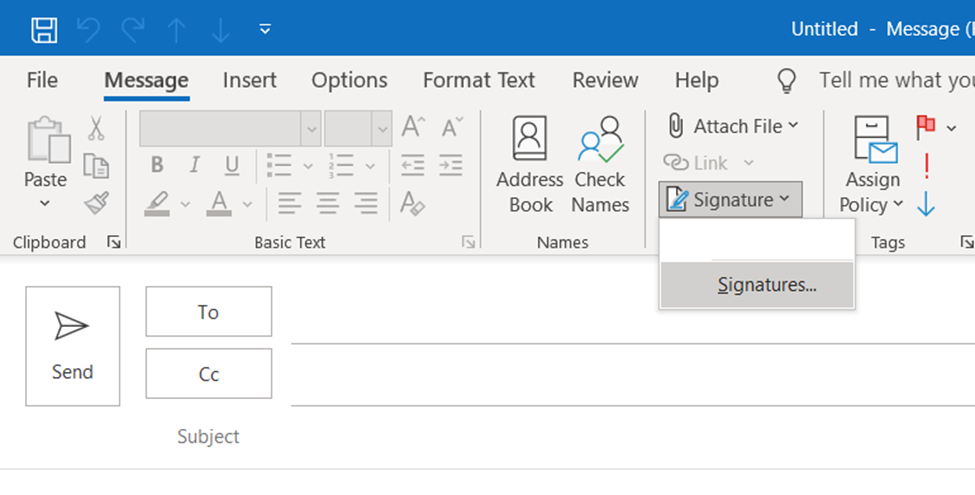
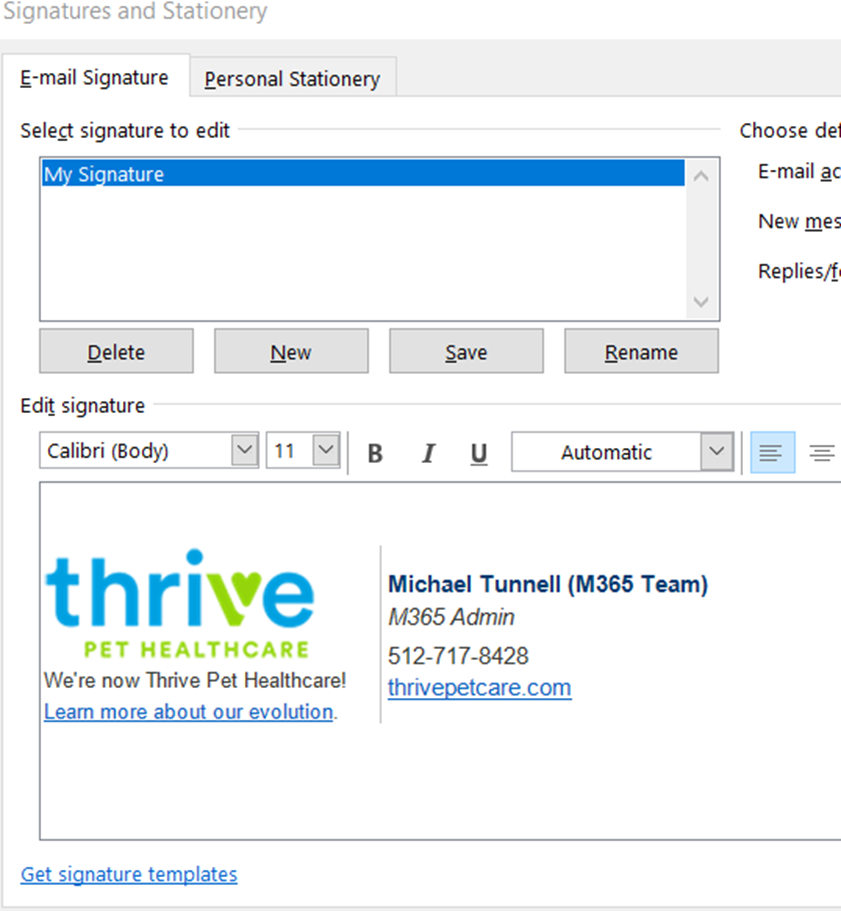
Select the Signature at the top from the Message ribbon and select Signatures from the drop-down.
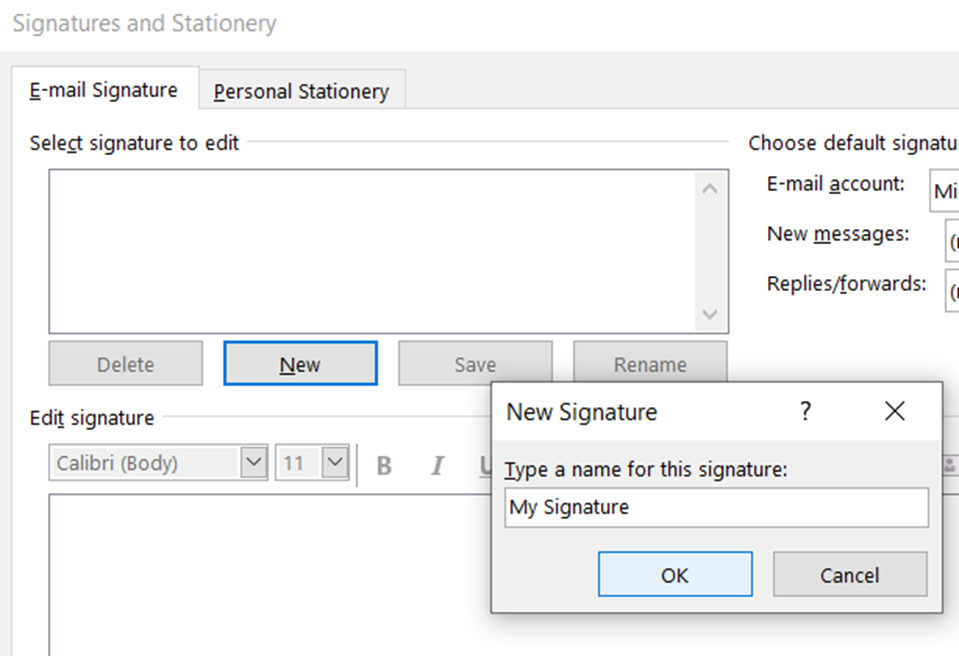
Select the New button in the middle of the window, then enter a label for the new signature. Click the OK button when finished.
Place the cursor in the large box on the bottom half of the window, right-click and select Paste. The new signature is now pasted into the pane.
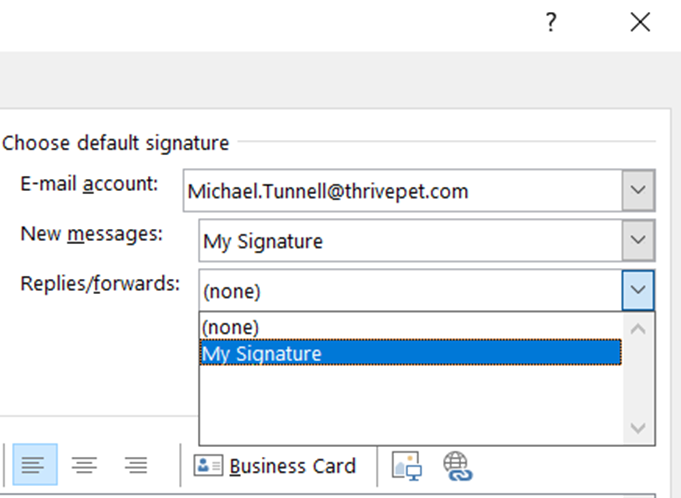
Define the conditions for this signature usage through the Choose default signature area at the top right-hand corner of the window.
Click the OK button at the bottom.
To confirm the new signature, close the empty email and open a new one.