Outlook: Share and Access a View-only Calendar
We are currently upgrading from Windows 10 to Windows 11. The desktop interface may appear differently than presented in this documentation. Please bear with us as we update and resolve these discrepancies. This process will not affect the online experience.
Refer to https://support.microsoft.com/en-US for additional information on Microsoft subjects.
Some instructions require appropriate permissions to complete the task.
If using a work account in Outlook, you can send a sharing invitation to other users so they can view your calendar from within their own Outlook Calendar list.
Calendar sharing isn't limited to the default Calendar folder that's created in all Outlook profiles. You can create additional calendar folders and choose which ones to share. For example, you can create a calendar folder for a specific project and share it with your co-workers or a family calendar that includes all the events and appointments for family members.
This article describes how to share and access a calendar that can only be viewed. This means the people you're sharing it with can't make changes to it.
Note: If the steps under this New Outlook tab aren't working for you, you may not be using new Outlook for Windows yet. Select the Classic Outlook.
Share a Calendar with Others in New Outlook
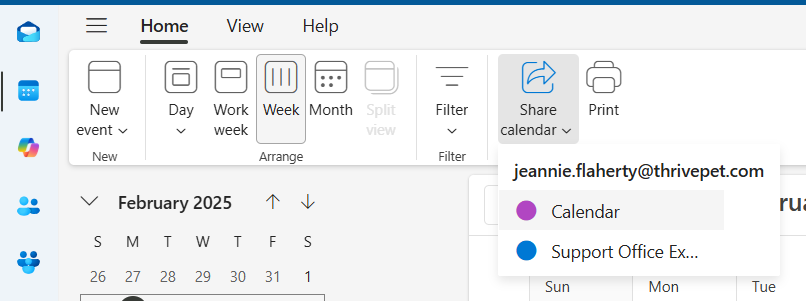
From the navigation pane, select Calendar.
On the Home tab, select Share. If you have more than one calendar, select which calendar you want to share.
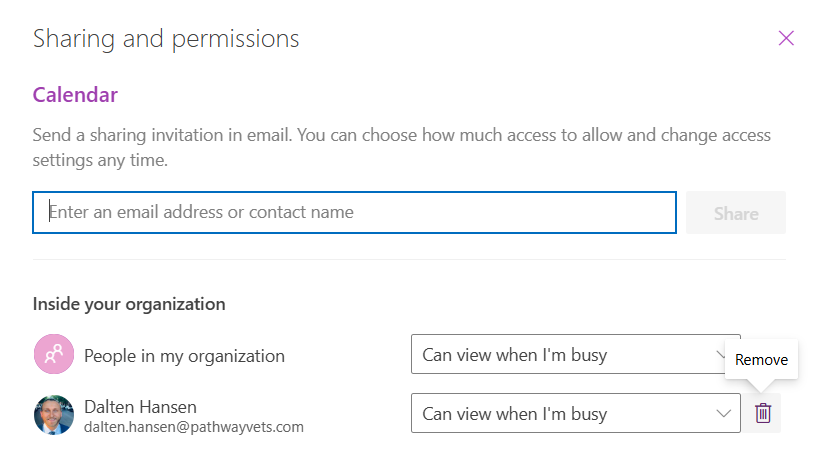
See who has access to the Calendar and what permissions are granted.
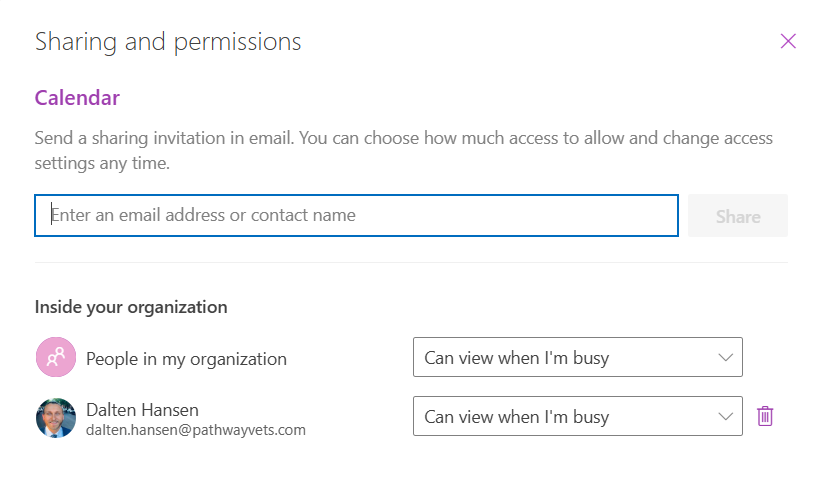
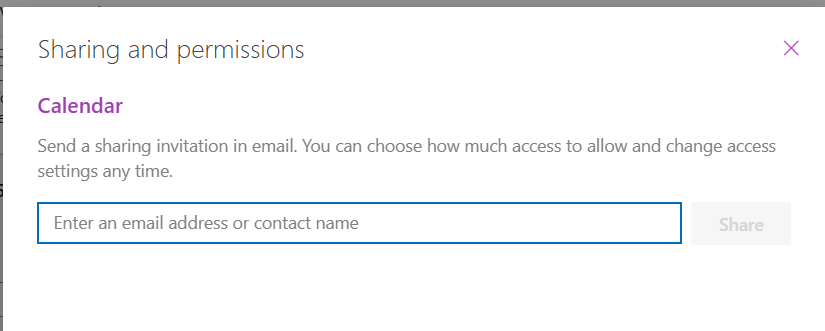
To add access to the calendar, enter an email or contact name. If the person's name appears in a list, select it.
Choose the viewing permissions for this calendar.
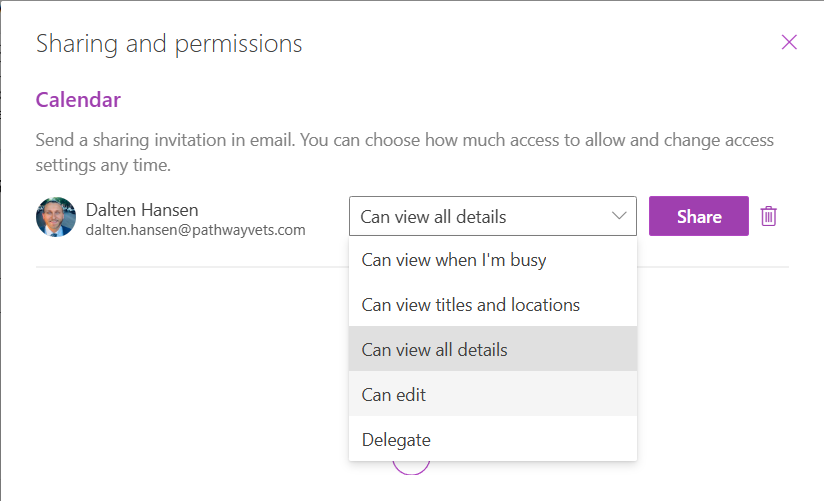
If adding a person to manage the calendar, select the drop-down list next to their name and choose the level of access you want them to have.
Select Can view when I'm busy to give them permission to see only when you are busy but not the details of items on your calendar.
Select Can view titles and locations to give them permission to see when you're busy, plus the titles and locations of items on your calendar.
Select Can view all details to give permission to see all details of items on the calendar but not make changes to it.
After adding the person and choosing a permission level, select Share.
The person you're sharing a calendar with will receive an email invitation to share their calendar. Once they accept, they can add your calendar to their own view.
Remove Access to a Calender
From the navigation pane, select Calendar.
On the Home tab, select Share calendar.
Click the Remove/trash can next to the desired recipient.
Publish a Calendar
Publish a calendar and then share the link with others to let them view the calendar online.
From the navigation pane, select Calendar.
Select the View tab Calendar settings > Calendar > Shared calendars from the ribbon.
Under the section Publish a calendar, select the calendar to publish from the dropdown and select the permissions to grant.
Click Publish. HTML and ICS links will appear below.
Copy the link. Copy the HTML link if you want recipients to view the calendar in a browser, or copy the ICS link if you want them to subscribe.
Select Unpublish to unpublish the calendar.