SharePoint: Upload a Form/Document to Community
We are currently upgrading from Windows 10 to Windows 11. The desktop interface may appear differently than presented in this documentation. Please bear with us as we update and resolve these discrepancies. This process will not affect the online experience.
Refer to https://support.microsoft.com/en-US for additional information on Microsoft subjects.
Some instructions require appropriate permissions to complete the task.
New Form or Document
If you are REPLACING a document, scroll down to the Revised Document section.
If you have a new form to upload to a SharePoint Library, remember to check the file name before uploading. Do not have a date or version in the filename, as these components change with each update, breaking the link to that document when it is replaced.
Navigate to the desired destination site.
Click the cogwheel in the upper right-hand corner and select Site contents.

Typically, you will save the document to the Documents folder. However, some sites have additional custom document libraries. Make sure you are in the correct document library for the site.
Select the desired document library, and then from the Upload button, choose Files, Folder or Template.
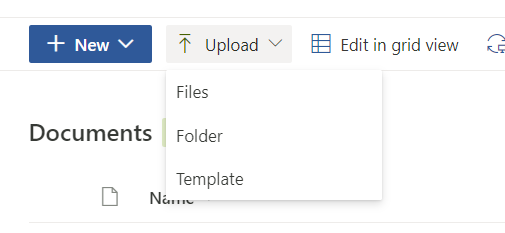
Typically, you will select Files.
A window will open to select the desired NEW file to upload. Click the filename and select Open.
Revised Form or Document
When updating a form for use, it is imperative NOT to change the file name if the goal is to maintain any links already saved to that form. Example: if a form is referenced in a supporting Policy, and the form is linked in the Policy.
It is also essential for the best Team Member experience to avoid having multiple versions of the same form in the library, which lends to the question, “Which version do I use?”
To avoid these problems, name the new file exactly the same as the old file and upload it to replace.
Once the new file is named exactly as the one it replaces, select Upload, then choose Files, Folder, or Template.
Select the NEW file from the desktop or documents and select Open.
A notice will appear to confirm you are REPLACING the existing document. Select Replace.
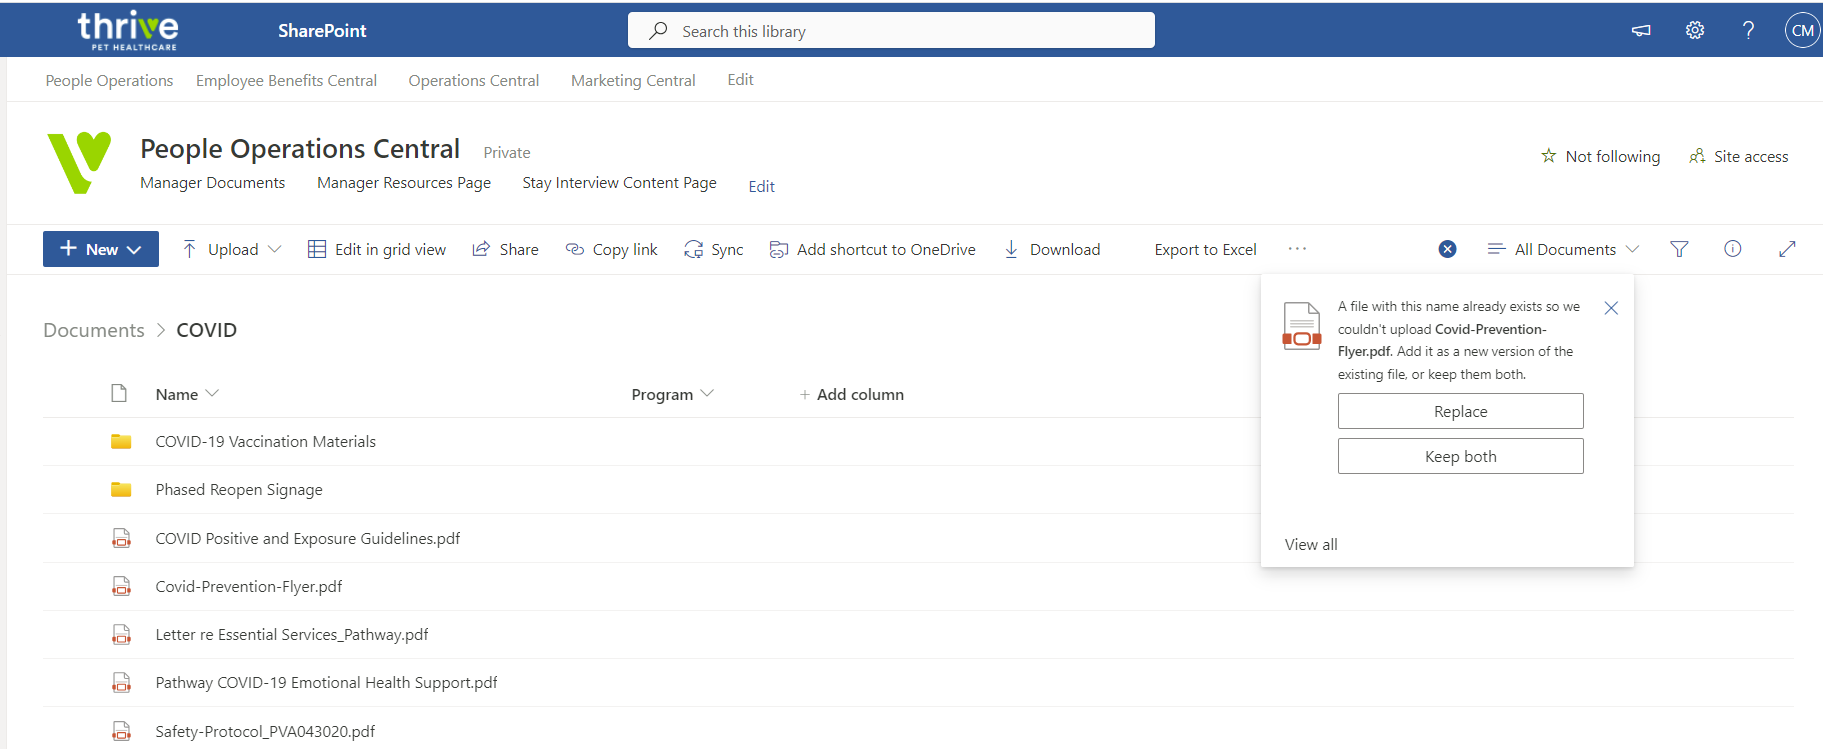
TIP: If, after naming a file, you are not given the option to REPLACE, the replacement file is under a different name than the original. Copy the name of the old file for the best result.
If you wish to have a version history or last edit date on the form, either place that information in the form's footer or record that information in the SharePoint Document Library metadata column.
Administration
The Documentation Specialist is generally responsible for administering this procedure and may select others to assist with executing duties. The duties of the Documentation Specialist include, but are not limited to, the following:
Assisting with the implementation and enforcement of this Procedure and
Circulating this Procedure to all Company Persons
Contact
Contact pnp.request@thrivepet.com with any questions regarding any of the provisions of this procedure.